How to Create a Location
How to Create a Location
Section titled “How to Create a Location”Locations in LogCentral represent the sources of your logs - typically physical sites, data centers, or logical groupings of devices. Each location gets a dedicated IP address and port for receiving syslogs.
What is a Location?
Section titled “What is a Location?”A location is:
- A container for logs from a specific source
- Assigned a unique IP:port combination for log ingestion
- Configurable with its own retention and alert settings
- The basic unit for organizing your log data
Example Use Cases
Section titled “Example Use Cases”| Use Case | Location Name Example |
|---|---|
| Physical site | ”NYC Office”, “London DC” |
| Environment | ”Production Servers”, “Dev Environment” |
| Device type | ”Firewalls”, “Wireless APs” |
| Client (MSPs) | “Client ABC - Main Site” |
Prerequisites
Section titled “Prerequisites”Before creating a location:
- You must have a LogCentral account
- You must belong to an organization
- You need Owner or Admin permissions in that organization
Creating a Location
Section titled “Creating a Location”Step 1: Navigate to Locations
Section titled “Step 1: Navigate to Locations”- Log in to LogCentral
- Select your organization
- Go to Locations in the sidebar
- Click Create Location or Add Location
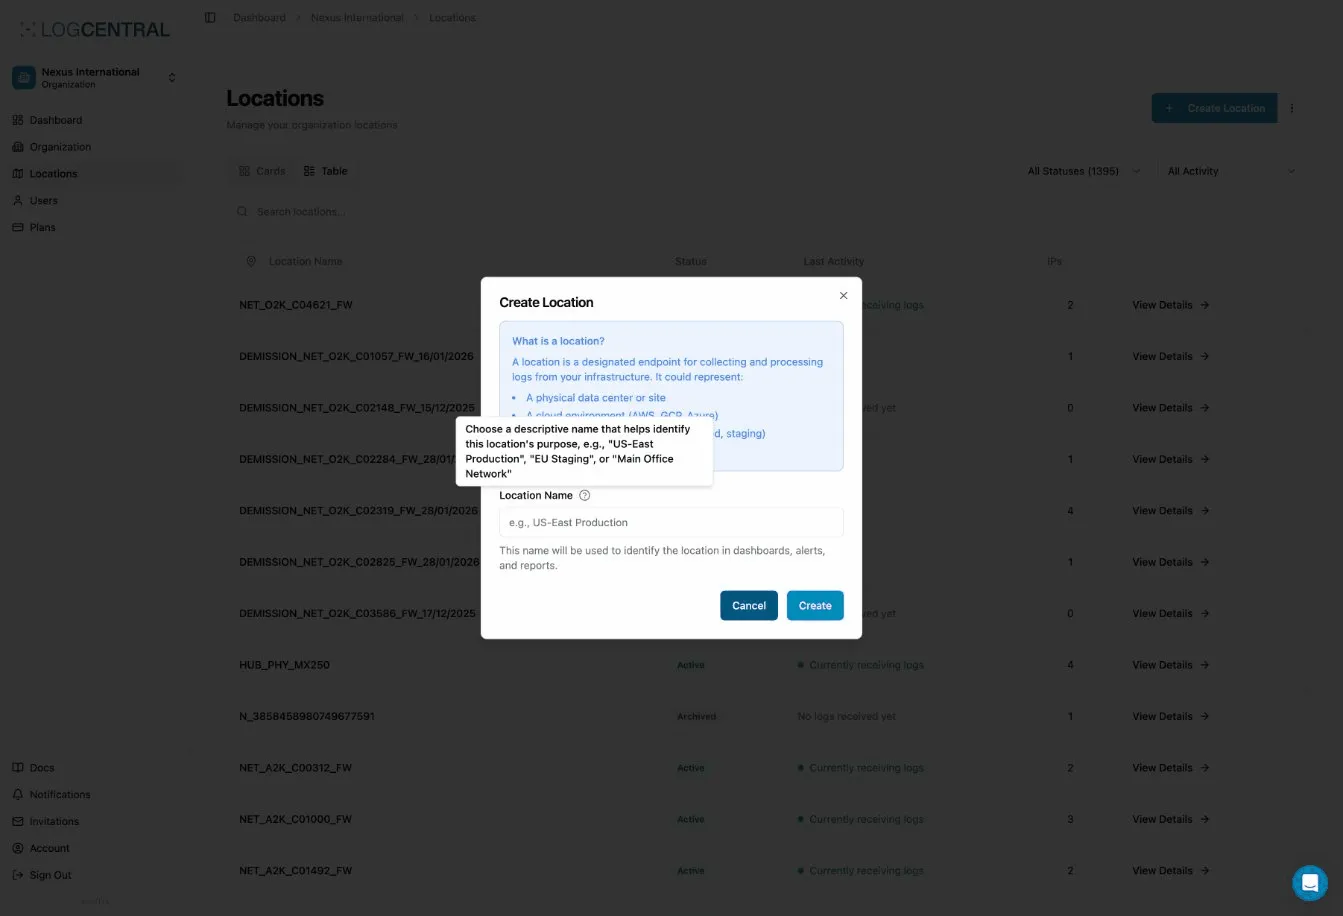
Step 2: Enter Location Details
Section titled “Step 2: Enter Location Details”Required Fields:
| Field | Description | Example |
|---|---|---|
| Name | Descriptive name for the location | ”HQ Firewall Logs” |
Optional Fields:
- Description
- Tags for organization
- Custom retention settings
Step 3: Get Your Connection Details
Section titled “Step 3: Get Your Connection Details”After creation, you’ll receive:
- Server IP: The IP address to send logs to
- Port: Your dedicated port number
- Protocol: UDP (default) or TCP
Example:
Server: logs.logcentral.ioPort: 51234Protocol: UDP/514 formatStep 4: Configure Your Devices
Section titled “Step 4: Configure Your Devices”Use the connection details to configure syslog forwarding on your devices. See our configuration guides for specific vendors:
- Cisco Meraki
- Generic syslog setup (pfSense, UniFi, etc.)
Location Settings
Section titled “Location Settings”IP Management
Section titled “IP Management”Control which IP addresses can send logs to this location:
- Open (default): Accept logs from any IP
- Restricted: Only accept logs from whitelisted IPs
See Location IP Management for details.
Status
Section titled “Status”Locations can be:
- Active: Accepting and storing logs
- Archived: Not accepting new logs, historical data preserved
- Inactive: Paused, can be reactivated
Best Practices
Section titled “Best Practices”Naming Conventions
Section titled “Naming Conventions”Use clear, consistent naming:
✓ Good: "NYC-Office-Firewall"✓ Good: "Client-ABC-Main"✓ Good: "Prod-WebServers-US-East"
✗ Avoid: "Location 1"✗ Avoid: "Test"✗ Avoid: "asdf123"
One Location per Site
Section titled “One Location per Site”Generally, create one location per:
- Physical office or building
- Data center or cloud region
- Major network segment
- Client (for MSPs)
Don’t Over-Segment
Section titled “Don’t Over-Segment”Avoid creating too many locations:
- Harder to search across multiple locations
- More connection details to manage
- Consider using log filtering instead
Verifying Log Reception
Section titled “Verifying Log Reception”After configuring your devices:
- Go to your location’s dashboard
- Check Live Logs or Hot Search
- You should see logs appearing within minutes
- If no logs appear, check:
- Device syslog configuration
- Firewall rules (allow outbound UDP/TCP to LogCentral)
- IP whitelist settings
Location Limits
Section titled “Location Limits”Depending on your plan:
| Plan | Locations |
|---|---|
| Light | 2 |
| Business | 10 |
| Enterprise | 50 |
| Custom Enterprise | Unlimited |
See Pricing for current plan details.
Managing Locations
Section titled “Managing Locations”Editing a Location
Section titled “Editing a Location”- Go to Locations
- Click on the location name
- Click Settings or the edit icon
- Make changes and save
Archiving a Location
Section titled “Archiving a Location”If you no longer need to collect logs but want to keep historical data:
- Go to location settings
- Click Archive Location
- Existing logs are preserved
- No new logs will be accepted
See Archiving a Location for details.
Deleting a Location
Section titled “Deleting a Location”Warning: Deleting a location permanently removes all its logs.
See How to Delete a Location for the process.
Troubleshooting
Section titled “Troubleshooting”No logs appearing?
Section titled “No logs appearing?”- Verify device syslog configuration
- Check the server IP and port are correct
- Ensure no firewall is blocking outbound syslog traffic
- Verify IP whitelist settings (if enabled)
- Wait 2-3 minutes for logs to appear
Wrong location receiving logs?
Section titled “Wrong location receiving logs?”- Check the port number in your device config
- Each location has a unique port - verify you’re using the right one
Location at capacity?
Section titled “Location at capacity?”- Check your plan’s log retention limits
- Consider upgrading your plan
- Or archive old locations to free up capacity
Next Steps
Section titled “Next Steps”After creating your location: